Tuesday, April 1, 2014

Michaels Kids Club Events for April

Michaels Stores offer 30 minute Kids Club events every Saturday morning. They offer 4 sessions each week between 10a and noon. Each Kids Club events cost $2/child and are for children ages 2 and up.

April events are:

  • Saturday, April 5 - Whimsical Works of Art - Kids can paint an original painting on canvas 
  • Saturday, April 12 - Craft Easter Fun - An Easter Fun Craft
  • Saturday, April 19 - Custom Wood Canvas - Create your own design on a custom wood canvas
  • Saturday, April 26 - Mother's Day Duck Tape Heart Frame - Create a DIY heart frame for Mom

Wednesday, March 5, 2014

Party Game Ideas: Pictionary

A huge hit at our recent kids gatherings has been playing our own version of "Pictionary". While we have the Disney Pictionary version, it is better for a small group of 2-4 people. I was inspired by the old "Win, Lose, or Draw" Game Show (which has just been rebooted on Disney Channel) and the new "Hollywood Game Night" to turn the game into a party game.
Disclaimer: I am an iTunes Associate and Amazon Affiliate and am compensated for sales through iTunes and Amazon links. I appreciate your support of my blog by shopping through my links.
My initial thought was to use the white board on my daughter's easel as our drawing medium. Then I had the brainstorm of using our AppleTV and an iPad through Air Play. Unfortunately, I have a first generation iPad which is not compatible with Air Play and my phone isn't very large as a drawing surface. My husband has an iPad2 and has let us use it for the game, even when he has been at work. We use the Penultimate a free app from Evernote and a Stylus to make drawing easier. If you are more of an Android based household, you may be able to accomplish the same thing with Google Chromecast HDMI Streaming Media Player.
Jungle Cruise Clue from our DisneySide Party
The benefit of making our own game is that I can create my own word list to fit any party theme. I type my word lists on the computer in a larger font than normal (i.e. Arial 18 pt) with extra line spacing. I usually print them on standard paper and fold them in a bowl. You could also use heavier card stock and place the cards in a pile.

Mr Potato Head Clue from DisneySide Party
The game has proven to be hugely popular among my daughter's friends. The kids who have attended multiple parties have asked if we will be playing it each time we have a party.

I have an interesting story for playing with a pre-reader. My niece is just starting to read and asked for help reading her word "Star", so I whispered it in her ear and she started drawing. I was more and more puzzled as she seemed to be drawing a race. Finally I asked her to whisper what she was drawing. She thought I had told her "Start". I have to say it was an amazing approach for a Kindergartener to take to a fairly difficult word to draw.

When designing my word lists, I try to include a wide variety of words and phrases. I want to allow kids of all ages to participate (I had kids from ages 3.5-8 plus adults at my daughter's family birthday) as well as those not familiar with the party theme.


Sunday, February 9, 2014

Star Wars Party: Princess Leia Pizza Roll Buns

When I think of Star Wars food perhaps the most iconic image is Princess Leia's "cinnamon roll" hair buns. I definitely wanted to incorporate them into the menu for my daughter's Star Wars birthday party. However, since we were already having birthday cake and brownies, I needed a lunch option. Instead of a sweet cinnamon roll, we decided to make pizza roll hair buns.

I kept the recipe simple by using a refrigerated Pillsbury Pizza Crust and jarred pizza sauce.

I started by spreading the crust out on a cookie sheet.
I then added sauce and my toppings. When adding the sauce leave 1/4-1/2" sauce-free section at one of the narrow ends to allow you to secure the end of the roll. For our toppings, we chose onions, peppers, and diced pepperoni. You can add whatever toppings you prefer. Diced toppings do work better than strips or large chunks.

Add your cheese and then start at the narrow end and roll your pizza up. Wrap the roll in plastic wrap and place in the freezer.


When you are ready to bake them, preheat the oven to 375F. If the rolls are frozen solid, allow them to warm up for 10-15 minutes before trying to cut them. Slice them in 1/2" thick sections and place on a non-stick mat (I used a Silpat Non-Stick Baking Mat) or parchment paper. Bake for 13-15 minutes or until the dough is golden and the cheese is melted.


The pictures above are from the test round that I made. For her actual birthday party, we made 4 varieties:
  • Cheese
  • Cheese & Pepperoni
  • Cheese, Pepperoni, Onions, & Peppers
  • BBQ Chicken (using BBQ sauce instead of tomato sauce) with onions and peppers
I was really happy with how they turned out. They were a nice way to incorporate the idea of Princess Leia's hair buns into an entree. Beyond the party, my daughter loved them, so I think we will make pizza rolls again even for a non-Star Wars theme party.


Saturday, February 8, 2014

Star Wars Light Saber Cake

My daughter wanted a Star Wars birthday party. Even though she likes brownies and not cake, she always wants a decorated cake as well as her brownies. So, I am usually perfectly content to buy a store bought cake since I know that I'll be making her brownies anyway. When we browsed the cakes at our local stores, the Star Wars themed cakes were mostly The Clone Wars themed which she was ver clear that she did not want.

One idea that I had was an R2-D2 cake. My mom had made my brother one in the early 80s. You start with a 13x9 cake and round the corners of one short end to make the dome and use those for feet at the bottom. Frost in white icing and add decorations (mostly blue), to match R2-D2
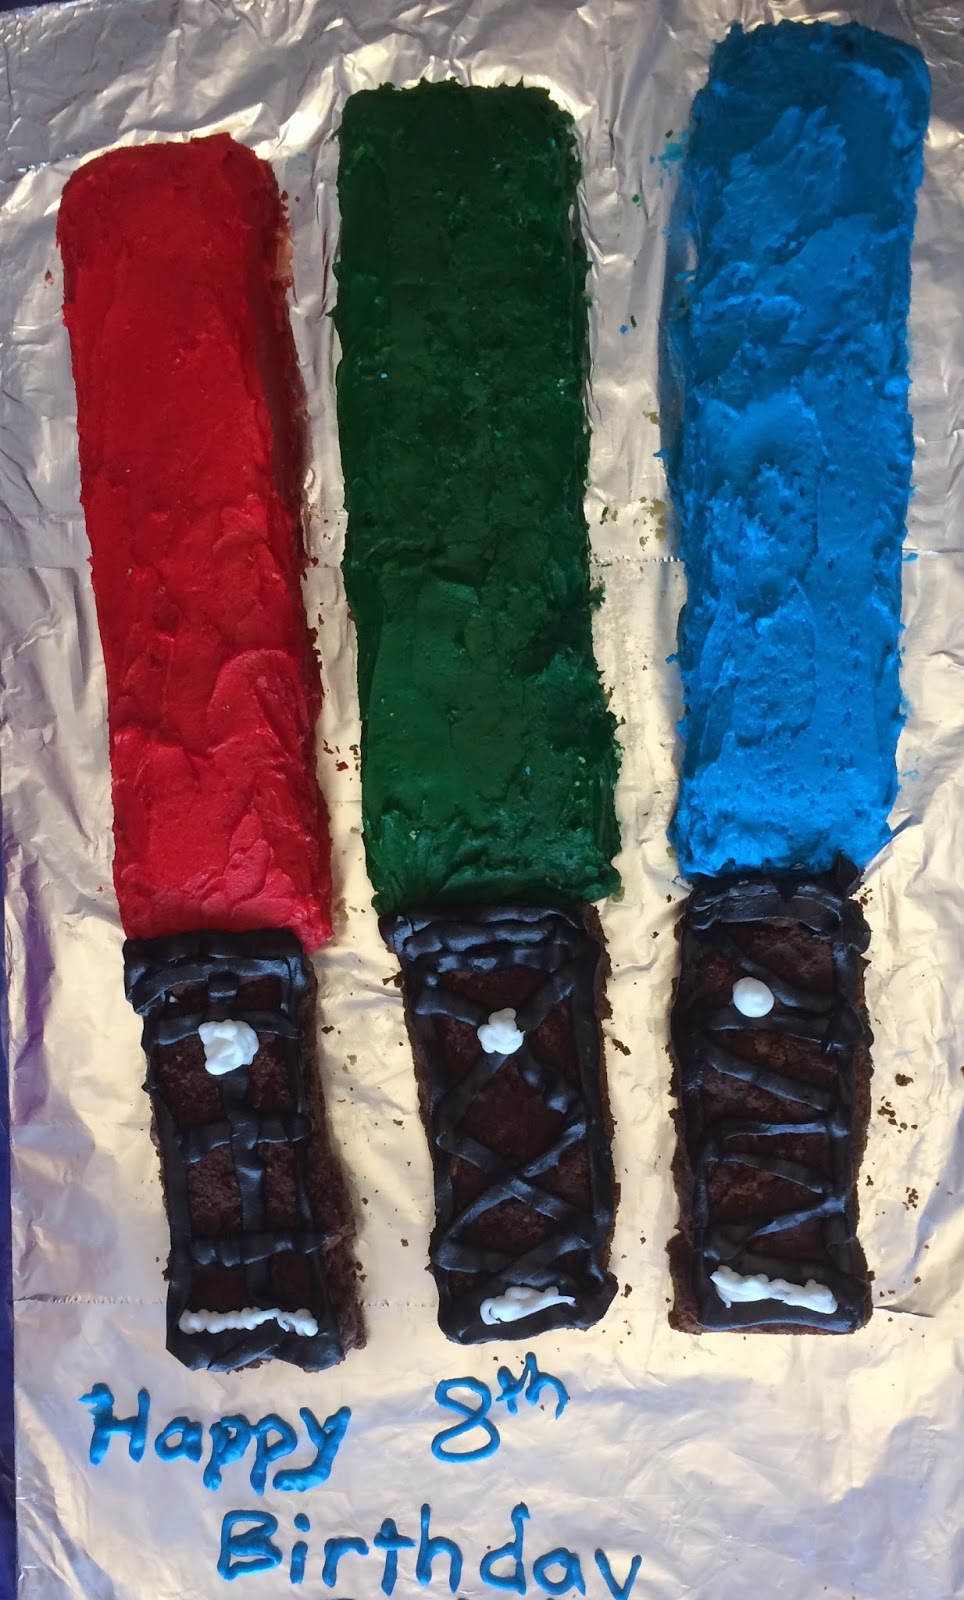
However, when I searched Pinterest, I found Light Saber Cakes. I was intrigued. Even better, I could combine my daughter's requested brownies into the cake as the handles for the lightsabers.

To start, I baked a 13x9 sheet cake and a 9x9 brownies. I used a box cake mix for the cake and my homemade brownie recipe. When making your brownies, make sure you use a recipe that is sized for a 9x9 pan. I used my 13x9 recipe and it did not bake well in the 9x9 pan. Next time, I would either use a box mix for a 9x9 pan or make a 13x9 pan and not use all of the brownies in the light sabers.

Once your cake and brownies are baked, allow them to cool completely. Select your light saber colors (my daughter chose red, blue, and green). I asked about a purple for Mace Windu, but she wanted the red, blue, and green.

Slide your 13x9 cake into 3 strips that are 13" long and approximately 3" wide each. These will be the blades of your light sabers. Slice the brownies into 3 strips that are 3" wide and 9" long. These will be the hilts of the lightsabers.

You will need to find a long board to hold your cakes (each light saber is ~22" long). I have a panel scrap from our family room built in that is the perfect length. I cover it in wax paper and two layers of foil. You could also use sturdy cardboard as your base.

Prepare your icing. I used homemade buttercream icing following the Domino Sugar recipe (made a batch and a half). However, any white based icing including store-bought would work. I split my icing into 3 equal amounts (light saber blades) and two smaller amounts (black and white). To dye my icing, I purchased the Wilton gel colors in red, green, and black. I used standard food coloring for the blue. The gel coloring will allow you to obtain more vibrant colors without using so much food coloring that you alter the taste and consistency of your icing. (Tip: Use the black very sparingly.)

Frost each cake section (tip: Freeze the cake sections for up to 30 minutes to reduce crumbling of the cut edges as you ice them). I find it easiest to frost one side and the top before placing them in position on the board. For the two that have a non-cut edge, I find it easiest for this to be the last side to frost as it does not crumble as much.

Place the brownies on the board. Use a small amount of icing under the brownie to anchor them in place. When I looked at my daughter's light sabers I noticed they all had different designs on the hilt, so I used a variety of Xs, stripes, etc in black. I also used a little bit of white at the base and to form the button.

Finally, I added "Happy 8th Birthday" in icing writing on the board below the light sabers. Trust me, this is why you want your brownies anchored...I didn't anchor them with icing and they slid into my writing as soon as I moved the cake. Fortunately I moved it right away and still had icing to redo the writing.

The cake was a big hit! The kids who prefer cake got cake, those who preferred brownies got brownies. With 13 kids and some parents, the cake was almost completely gone. It is a good thing that I had both the cake and brownie. Having the cake width already cut in thirds, it was very easy to cut the cake at the party.

Wednesday, February 5, 2014

February Events at Michaels Stores

Michaels Stores have a number of great events in February.

One of the first things that I noticed on their page was that they now host Rainbow Loom Meet Ups. Dates and times will vary by your store. The meet up is $5/child and does not include supplies. It is for children ages 6+

They will have a FREE Family Craft Time on Monday, February 10 from 5-7p to make a Love Bug Card.
Love Bug Card - Free Craft at Michaels Stores
They are having two FREE Family Craft events on Wednesday, February 12. In the morning, they will have Valentine's Frames from 10a-noon and Tissue Paper Hearts in the evening from 5-7p. Both events are Free. I am disappointed that the frame event is during the school day.

In addition, Michaels hosts 30 minute Kids Club sessions each Saturday morning from 10a-noon. Kids Club sessions are $2/child and for children ages 3 and up. Parents are welcome to shop in store during the session. Upcoming Kids Club events are:


Related Posts Plugin for WordPress, Blogger...